Create your first LibertAI agent
In this guide, we'll show you how to create and deploy a LibertAI agent 🚀
⚙ Requirements
You just need to have a recent version of Python installed (3.10 or more), and a LibertAI Agent subscription (that you should see in our chat UI after connecting your wallet).
TIP
If you are participating to one of our workshops, you should get a free subscription for a limited period of time, don't hesitate to ask a team member if you don't see it in the UI 😄
🧰 Project setup
Let's get started!
To simplify your experience, you can use our template repository to bootstrap your project.
Simplify click the "Use this template" button in GitHub and clone the created repository.
You should end up with a structure similar to this one:
template/
├─ src/
│  ├─ main.py
├─ .env.example
├─ .env.libertai.example
├─ .gitignore
├─ poetry.lock
├─ pyproject.toml
Here's a small explanation of the important files:
src/main.pycontains the boilerplate code and will be the main entrypoint of your agent.env.exampleand.env.libertai.exampleare files that you can rename to drop the.examplesuffix. The first can be used to pass environment variables to your program, while the.libertaione will be used in the deployment step (don't worry about it for now).
Dependency management
We are using Poetry in this template to manage dependencies, hence the presence of pyproject.toml and poetry.lock files.
Feel free to use pip directly if you want and are more experienced with it!
Take a moment to familiarize yourself with the few lines of code contained in src/main.py.
As you can see, it's pretty simple:
- We are defining a function that gets the temperature of a given location 🌡
- Then creating a
ChatAgentwith- a given model among the available ones (your IDE should provide autocomplete for the model ID, else you can use the name from the model page on HuggingFace) 🤗
- a system prompt (useful if we want to add some context to the objectives of the agent)
- a list of tools that includes our fake temperature function
And that's it!
The ChatAgent object will contain a FastAPI application in its app property that you can expose and even extend with your own routes if you need to (like the Hello World here).
Now let's see how we can use this base to create a useful agent 😎
📈 Customize your agent
Now the most interesting part: create the agent that fits your needs.\
Create your own tools, change the system prompt and give birth to any idea you have in mind 😄
Feel free to install any dependency you might need, use environment variables... classic Python code 🐍
🏗 More details are coming soon to this section to give you ideas, examples and tips
Non-API agent
If you don't want your agent to respond to users via an API call, you can use the expose_api=False parameter when creating the agent, and instead use Python code to call the functions that correspond to the API routes (eg: agent.generate_answer, agent.get_model_information...).
This might be useful if you want to encapsulate your agent in a Telegram bot using pyTelegramBotAPI for example (dedicated tutorial for this coming soon 😉)
🚀 Deployment
Now that your agent is ready, let's deploy it in a decentralized environment using Aleph.im! For this, you need to install our CLI that will simplify the deployment process.
You can do this inside on your system or inside your virtual environment (just make sure that it doesn't get added to your agent project dependencies):
pip install libertai-clientYou'll also need the ID of your agent and the related secret key that you got when subscribing in our UI.
In the code template, you should see a .env.libertai.example file with a content similar to this one:
# Public agent ID
LIBERTAI_AGENT_ID=

# Secret key that allows you to deploy or redeploy an agent
LIBERTAI_AGENT_SECRET=
Remove the .example from the file name and fill the values with the ones that you can find agents page of our UI.
WARNING
The secret key should stay private, view it as an API key that anyone can use to modify your agent, including redeploying it with a malicious code.
Now you can run the following command to start deploying your agent:
libertai agent deploy <project_path>It will ask you for:
- The package manager that you are using (it should be detected automatically, but you can change it if it's incorrect)
- The Python version of your project (the CLI will autodetect it too)
- Whether your agent should be deployed in API mode or is triggered by Python code
Then you can sit back and relax while the CLI deploys your agent 😎
It can take a few minutes the first time as your code and its dependencies are packaged and sent to our backend (that is itself located in an Aleph Confidential VM of course 😉) that will deploy it on an Aleph instance with Docker.
Once everything is done, you should have a result similar to this one: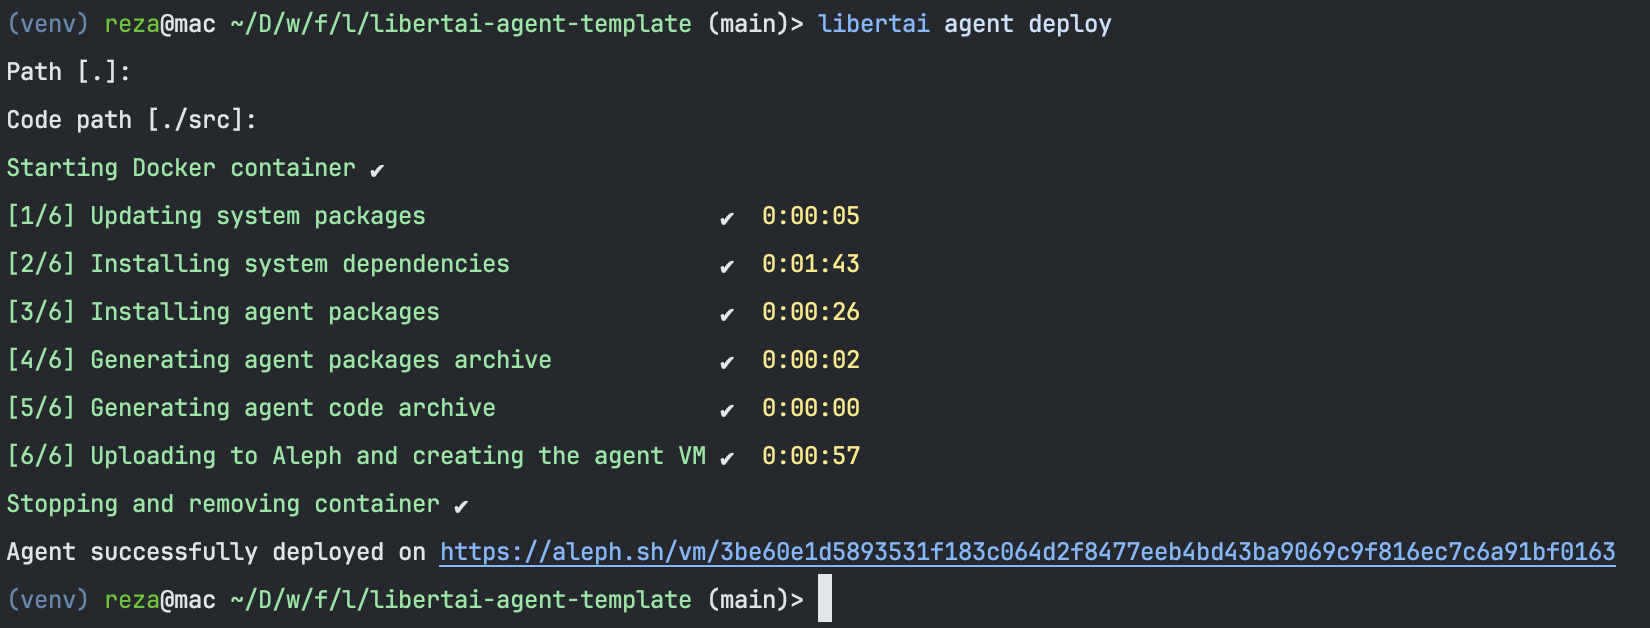
Your LibertAI agent is now deployed on Aleph's decentralized cloud 🚀
You can now call it on the /generate_answer endpoint to get completion responses.
💡 In the future you'll be able to pass custom deployment scripts if you have specific use cases (for example to deploy a vector database right next to the agent). You'll also be able to get an SSH key to connect yourself to the instance and make some changes.
TIP
Feel free to use the OpenAPI documentation at the /docs endpoint of your VM for the first call to familiarize yourself with the route parameters if you haven't already!
That's it for this tutorial 😎
If you'd like to go further, feel free to check other Agent guides and to join our Telegram if you need assistance from the team.